How to mount a coil insert from Baercoil
(European Helicoil alternative)
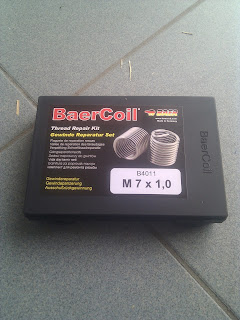
The usual solution for a stripped thread is to bore out the hole and tap a new thread of the next bigger size. After this, just go and find a bolt of this new size and you're all set. In my situation I couldn't use this solution since the bolts that hold down the valve cover of my Suzuki Bandit have a special head shape that mates with the gasket used to seal the cover.A better solution then going to the next oversized hole is to repair the existing thread with Baercoil inserts (in the US these are called Helicoil inserts). After the repair the original bolt can be used, since the repaired hole has the same size of thread as the original hole. Another advantage is that the repaired thread will be much stronger then the original one was. That's why this system is used, not as a repair but as an original installation, in aircraft engineering.
A few simple steps
(or check out "what to do when things go wrong" at the bottom of this post)
First, I had to open up my engine and remove the first cam cap. This is an easy repair, since the valve cover is not attached directly to the engine head but is mounted using a hole in the caps that hold the camshaft. So we just need to remove the camshaft. You can see the bolts partially unscrewed on the first cap I will be taking out. Be carefull to replace the caps in their exact same position. They are not interchangeable, since the caps have been machined to match with the camshaft. (This is also why it's not possible to buy replacement cam caps. If you ever need to replace them, you need to replace the complete engine head!) To avoid mixing them up, I unmount and remount them one by one.

This is a picture of the first cam cap removed. Make sure the leave the bushes in their seats and to not move or touch the camshaft. Any dirt you get on it will grind between the camshaft and the cam cap.


The first step is to drill out the hole. Make sure you hold your drill very straight in all directions when you do this with a handdrill. I noticed it is much easier to drill when you set the speed on very slow and only drill one (or even 1/2) turn at a time. So I was actually drilling almost by hand, just using the torque of the drill at 0 rpm. Then I back up a little and I advance again for a bit. Once I reach the bottom of the hole, the drill turns freely. I also added a bit of cutting oil to facilitate drilling. After drilling, I clean the hole with some paper and I blow it out.


Next you need to insert the coil. Slide the coil over the mounting tool with the tang in the slit at the bottom of the tool. Do not remove the collar on the tool (read on why).

I added a bit of green loctite to the outside of the thread insert. This is to avoid the coil from unscrewing itself when I remove the bolts during the next valve job.


This is what the repaired hole looks like.


When things go wrong with the thread insert & how to remove a failed insert
On my second hole, I had a not-so-brilliant idea: I removed the collar around the coil mounting tool. I figured this would make it easier for me to see when the coil was turned all the way in (+1/2 turn). However, this causes the tool to pull (using the tang) on the bottom of the coil instead of pushing it from the top (using the collar).The result was an insert that couldn't hold a bolt. The threads were 2 thread-widths aparts at the top of the insert. On top of that, I had already broken of the tang before I noticed things went wrong. (In retrospect, I doubt turning anti-clockwise with the mounting tool would have had any effect, besides breaking of the tang anyway).
To remove the failed coil insert, I tapped for 2 turn in the baercoil insert itself. This broke off some material, but also made the end of the coil point upwards so I could grap it with a pair of pliers. Using the pair of pliers, I slowly pulled out the coil in a spiraling motion. The coil became about 5cm long in this process, but I managed to remove it completely.
After cleaning the threads by screwing the tap all the way in and out again I successfully mounted another coil insert. The only disadvantage was that it had to be mounted a little bit deeper since the first 2 rows of thread got damaged during the removal.
No comments:
Post a Comment